
In a previous post we were learning how to install and configure ArgoCD to learn how to deploy your Kubernetes app.
In this new post we will be seeing how to integrate our first Kubernetes deployment by default and learn the basics to start automating our services and workloads.
Before starting we must have something to deploy. For this lab I have prepared a default deployment that will create 3 pods with a Nginx container in each. You can take a look or using it by this link: https://github.com/JoaquinJimenezGarcia/argocd-deploy-test but in case you want to create your own repo basically it looks like this:
apiVersion: apps/v1
kind: Deployment
metadata:
  name: nginx-deployment
  labels:
    app: nginx
spec:
  replicas: 3
  selector:
    matchLabels:
      app: nginx
  template:
    metadata:
      labels:
        app: nginx
    spec:
      containers:
      - name: nginx
        image: nginx:1.14.2
        ports:
        - containerPort: 80
Now that we have our ArgoCD up and running, we will see that it’s empty. However in the upper left corner we would see a button labeled “New App”. We must click there and a new window will pop up with some info we must complete.
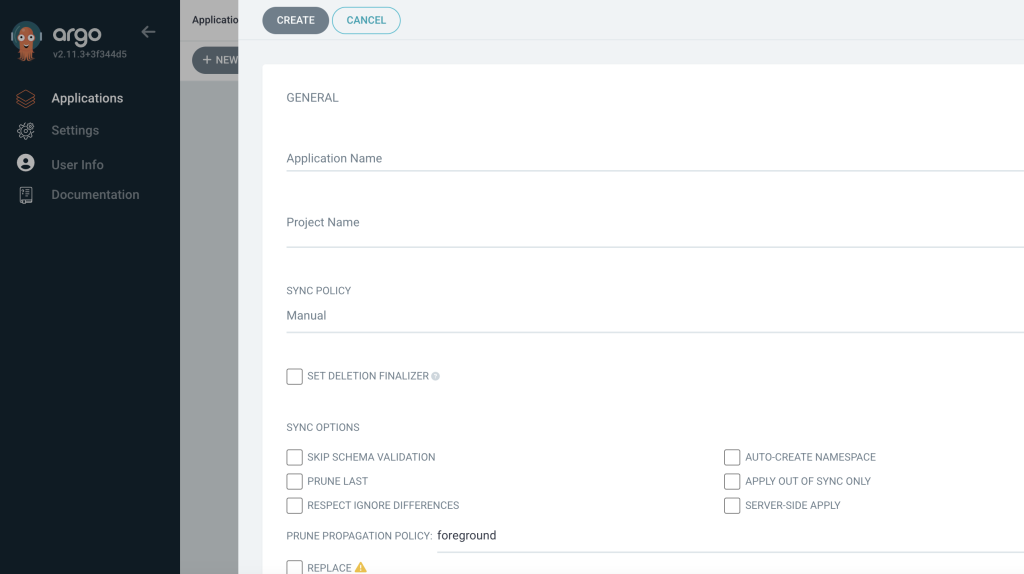
However these are the most important fields we need to fill:
- Application Name: this is the name that will return our ArgoCD to refeer to our resources. We can assign here the value that we want, but following the name of the deployment I gave it the same one: argocd-deploy-test
- Project Name: the project we are going to use in ArgoCD, since we only have “default” this is the value it must have, but we can create multiple projects with multiple resources
- Sync Policy: if we want to sync manually or automatically, we would mark “automatically” since we want to be updated if we update the YAML files on Github
- Repository URL: where the YAML files live, if you are using directly the one I have created, it’s https://github.com/JoaquinJimenezGarcia/argocd-deploy-test
- Path: the path to deploy our pods, by default I left it as “.”
- Cluster URL: in which cluster we want to deploy, since we only have the cluster where ArgoCD is installed, we can leave it as https://kubernetes.default.svc
- Namespace: the namespace where the pods would be deployed, as a good practice we should have multiple namespaces, but as per this lab we are going to be uing only “default” namespace
Now we have all these fields ready, we need to click on create app and ArgoCD autimatically will go to our repo, read the yaml files and execute them.
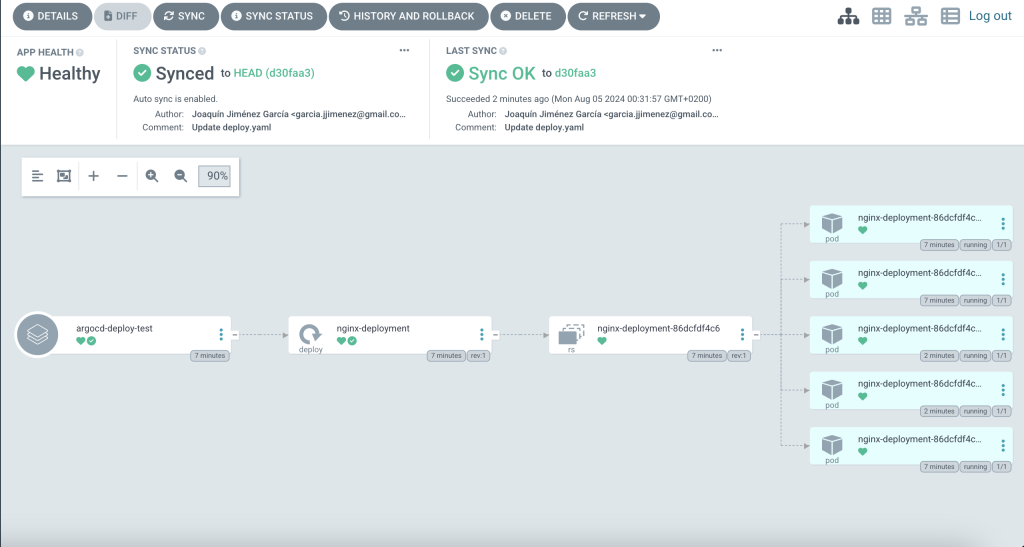
Because this is only a small YAML file, we should see just a few seconds later our app completeley deployed
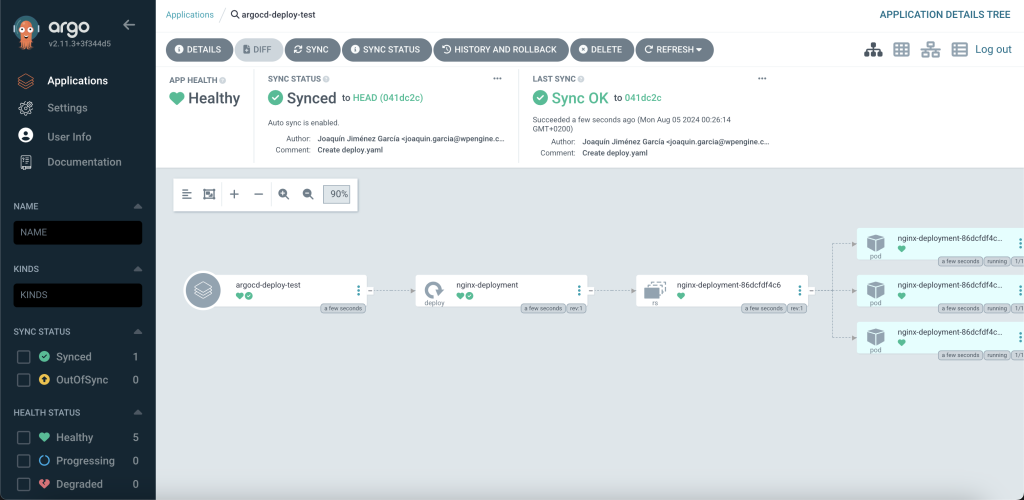
If we want to double check, we can go to our cluster and examine the pods looking to see if the pod names match with the ones are deployed there:
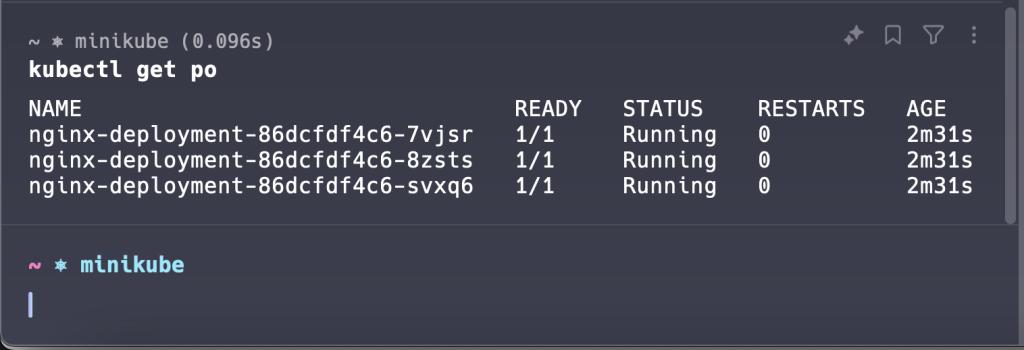
And as we can see, the results matches, so our app is perfectly deployed.
So as we marked the auto sync, now it will be reading our Git each 3 minutes to detect changes and apply them. So if for example we push a PR changing the replicas from 3 to 5, it would be updated automatically without more human interaction.
gran tutorial, bendisiones
Muchas gracias, Kevin! 🙂