
Have you already coded a service and you are not sure where to deploy it? You can use Google Cloud Platform to deploy your first computing cloud service!
Let’s imagine you have your service written in Python using Flask (this doesn’t really matter, is just an example and can actually be replicated for every other language).
from flask import Flask

app = Flask(__name__)


@app.route('/')
def hello_world():
    return 'Hello World'

if __name__ == '__main__':
    app.run()
Requirements
The next thing we would need is to create then a Dockerfile, but why? Well, dockerizing our service will help us to use any of the services available in GCP which can run Docker containers, mainly Cloud Run and Kubernetes. But in this case we will be using just Cloud Run since it will work out of the box and we won’t need to configure any subnetwork neither other services to expose externally our application.
FROM python:3.11

RUN pip install gunicorn
COPY . /app
WORKDIR /app
RUN pip install -r requirements.txt
ENV PORT 8080

CMD exec gunicorn --bind :$PORT --workers 1 --threads 8 app:app
Once we have our Dockerfile ready, we will just need to create the image based on that definition containing our service:
$ docker build -t <your_service_name> .Pushing to the Cloud
Next, make sure you have Compute and Artifact APIs in GCP enabled and create a repository in Artifact Registry where we would push our image that we just created from that Dockerfile.
When we already have the repository created in Artifact Registry, is time to push our image!
# Tagging the image so we can reference it
$ docker tag SOURCE-IMAGE LOCATION-docker.pkg.dev/PROJECT-ID/REPOSITORY/IMAGE:TAG

$ Pushing the image to the repository
docker push LOCATION-docker.pkg.dev/PROJECT-ID/REPOSITORY/IMAGE:TAG
Afterwards you should see your image in the repository:

Creating our service
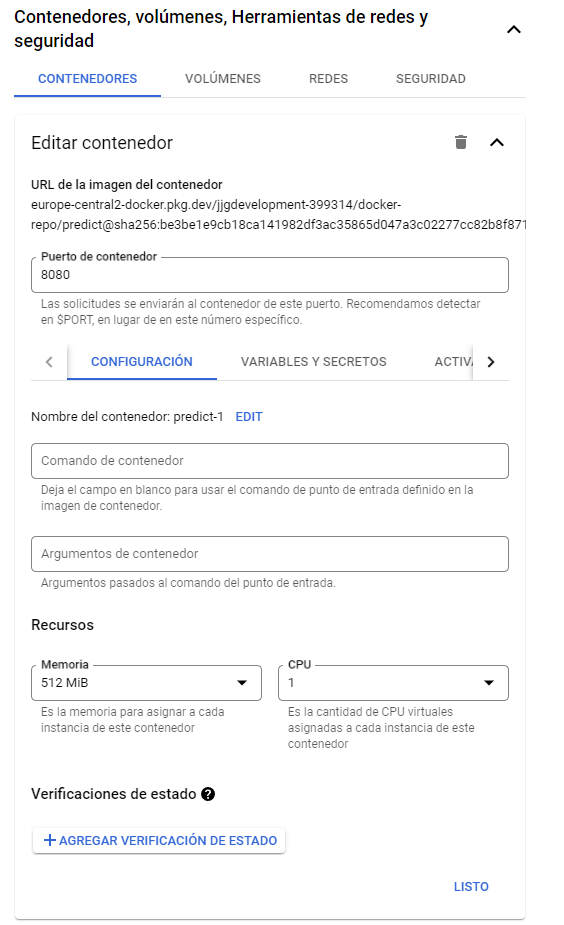
Now we are ready to deploy our service! Go to Cloud Run section and create a new service. It’s very important that you give it a meaningful name, since the URL to access it will include that name. Mark the source as “Artifact Registry” and in the select box look for the docker image you just uploaded.
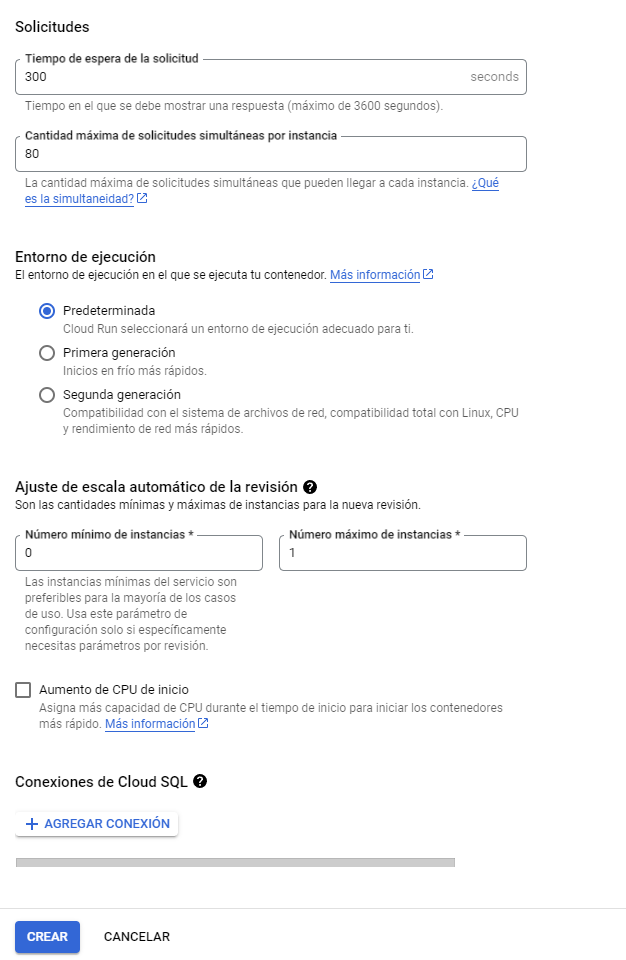
A few good recommendations will be:
- Allocate the CPU only during requests.
- Allowing invocations without autintication and expose it to everyone (in case you want to have an internet facing service, otherwise expose it only internally and requiring authentication).
- Use first generation of CPU and disable the option to have boost CPU to save some money.
- Declare the same port we declared on Dockerfile and assign optimized resources to not have to over pay at the end of the month.
- Limit the number of instances to not have multiple CPU consuming money.

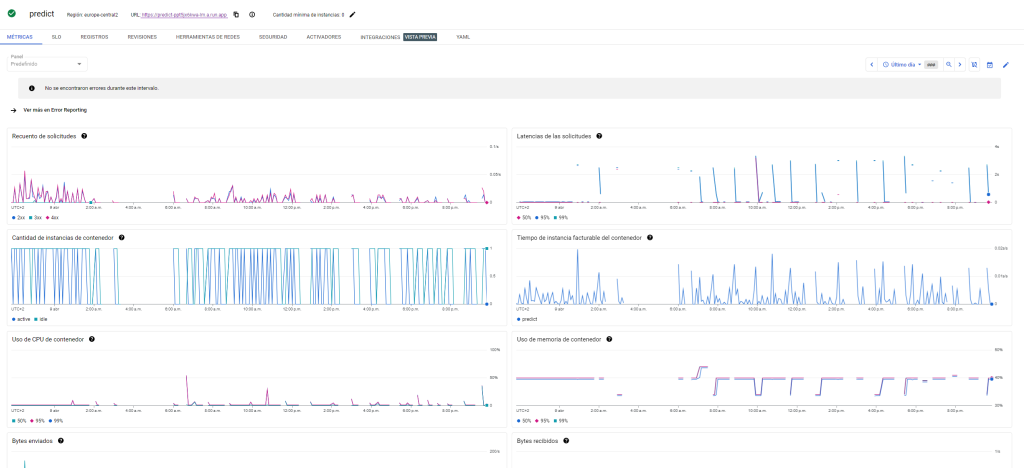
If we followed all the previous steps in order, most probably your new instance has already spined up and you have now your service in production! You will be given a dedicated URL using HTTPS and you will see some insightful dashboards to see the metrics of your service
If you want to learn more about Cloud Run and how to optimize your services, don’t hesitate to consult our section where I talk more deeply about this service.
Leave me your comment below!